Creating an Exhibition from a Call | Exhibitions | Crafted Call
Creating an Exhibition from a Call
Gallery OwnersUpdated Jul 17, 2026
Exhibitions showcase accepted submissions and make them available for viewing, purchase, and public discovery. Crafted Call makes it seamless to create an exhibition directly from completed calls or to build one independently.
Option 1: Create Directly from a Call (Recommended)
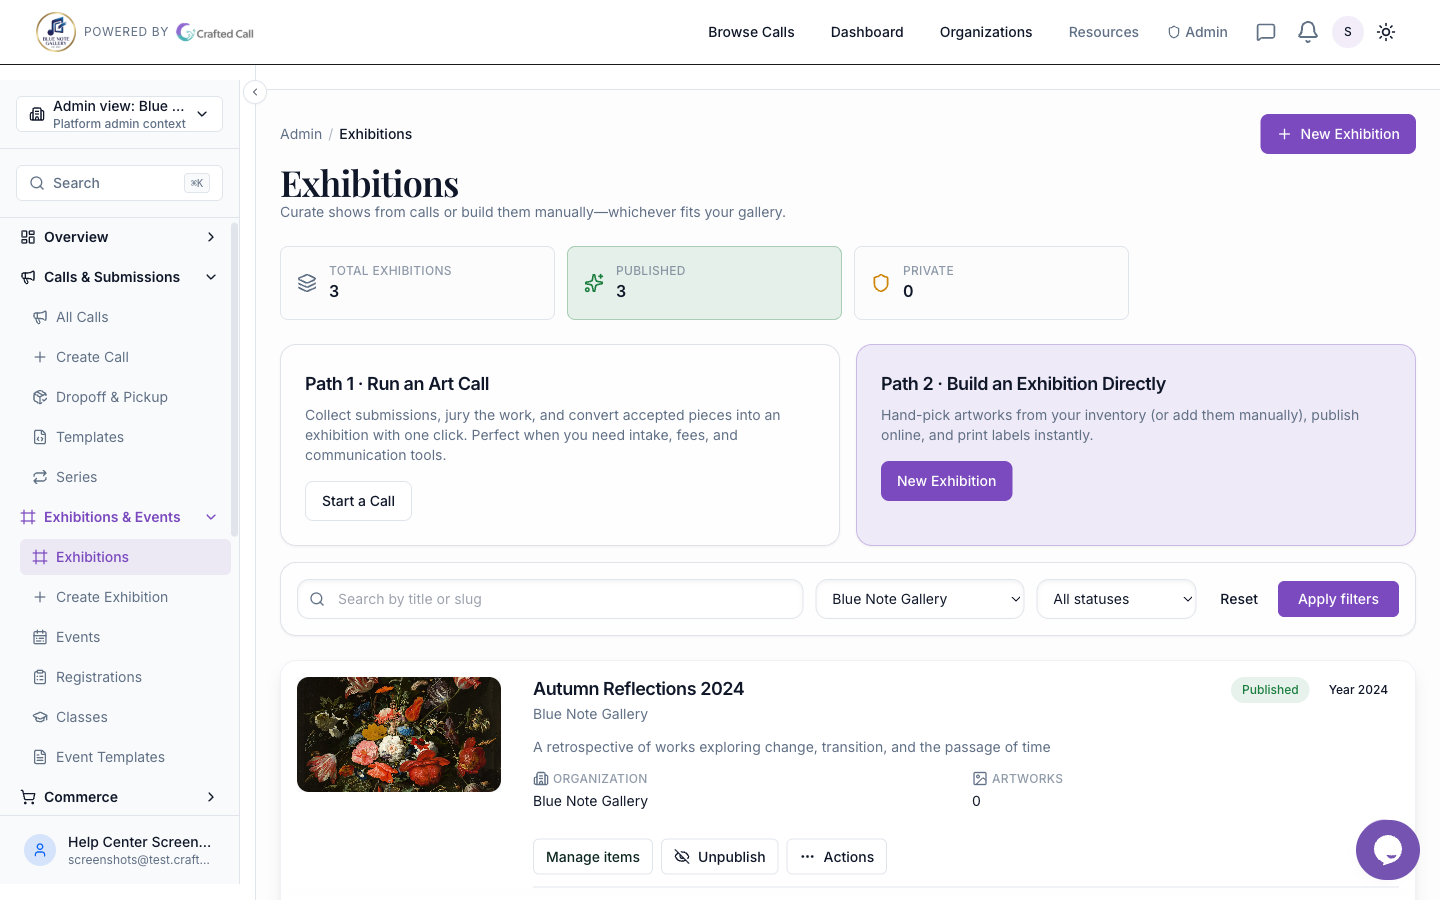
The fastest way to launch an exhibition is to create it directly from a closed call—accepted submissions automatically populate.
Navigate to your Call (closed or with jury results finalized)
Click Create Exhibition (button appears once jury is finalized)
Confirm or edit these auto-populated fields:
Exhibition Title (defaults to call name)
Description (optional—can be different from call description)
Start Date and End Date
Choose visibility and settings (see below)
Click Create Exhibition
Auto-populated submissions include:
All accepted submissions from jury results
Submission images and artist metadata
Original pricing and edition info (if provided in call)
You can add, remove, or edit individual artworks after creation.
Option 2: Create an Exhibition Independently
Create an exhibition from scratch and manually add artworks:
Go to Exhibitions
Click + New Exhibition
Fill in:
Title
Description (rich text—supports formatting)
Start & End Dates
Exhibition Location or Online Only
Configure settings (see below)
Click Create
You'll land on the Artworks tab to start adding pieces
After creation, link artworks manually by:
Uploading new artworks
Selecting from previous submissions
Importing from other calls or exhibitions
Tip: Independent exhibitions work well for invited artist shows, staff curations, or gallery-held inventory.
Was this article helpful?
Exhibition Settings: Visibility & Access
Configure who can view your exhibition:
Public — Anyone with the link (or search engines) can view
Displays in your gallery's exhibition page
Shareable via social media and direct link
No password required
Private — Only invited people can view
Disabled from public discovery
Generate a shareable private link for specific people
Access logs show who viewed
Password Protected — Public with a password gate
Anyone can find the link but must enter password
Useful for exclusive previews or VIP events
Change password anytime; old password automatically expires
To change visibility:
Open the exhibition
Click Settings
Find Exhibition Visibility
Select one of the three options
If password-protected, set a strong password
Click Save
Adding Artworks
From Call Submissions
If you created the exhibition from a call, accepted artworks are already included. To add rejected artworks or submissions from another call:
Click + Add Artwork
Select From Call Submissions
Choose the call and filter by:
Artist name
Status (accepted, rejected, pending)
Select submissions to add
Click Add Selected
Manual Addition
To add artworks not from a call:
Click + Add Artwork
Select Manual Entry
Fill in:
Title
Artist Name
Image(s) (upload or use existing gallery inventory)
Price (optional)
Edition Info (original, limited edition, print, etc.)
Description & Materials
Click Save Artwork
Bulk Import
To add multiple artworks at once:
Click + Add Artwork → Bulk Import
Download the CSV template
Fill in artwork details in spreadsheet
Upload CSV
Review and confirm
Exhibition Dates
Set exhibition duration to control visibility timeline:
Start Date & Time — Exhibition becomes visible at this moment (or immediately if set to past)
End Date & Time — Exhibition closes and becomes archived (still viewable, but marked as closed)
You can change dates anytime before or after the exhibition is live. Closing an exhibition doesn't delete it—it moves to Past Exhibitions but remains searchable and viewable.
Enabling Comments & Moderation
Allow visitors to comment on artworks and discussions:
Go to Settings → Community
Toggle Allow Comments
Choose moderation:
Pre-moderation — You approve all comments before they appear
Post-moderation — Comments appear immediately; you can remove inappropriate ones
No moderation — Comments post instantly with no review
Configure Comment Notifications (email you when new comments arrive)
Click Save
Moderate comments anytime by:
Opening the artwork
Scrolling to comments section
Clicking the ... menu on any comment → Delete or Report
Tip: Pre-moderation is best for public galleries or formal shows. Post-moderation works for trusted communities.
Publishing Your Exhibition
Your exhibition is live once:
It's created and Start Date has passed
Visibility is set to Public or Password Protected
At least one artwork is added
To verify it's live:
Open the exhibition
Click View Public Exhibition (top right)
You'll see the exhibition as visitors do
Share the public link on your website, social media, and email: